Image file formats #
LDR and HDR #
One difference between the various existing image formats is their support for color depth. This can be either designed for low dynamic range (LDR) or high dynamic range (HDR).
PNG (Portable Network Graphics), for example, is an LDR image format. 8 bits, i.e. 256 different color values, can be saved per color channel. PNGs have a color channel for red, green, blue, and optionally an alpha channel. This gives a total of 3 * 8 bits = 24 bits or 4 * 8 bits = 32 bits per color value. PNGs also offer support to store grayscale images. If you want to find out more about the feature set of PNG file format consider libpng which offers a reference implementation of the PNG format.
In contrast, there are also HDR formats. EXR is a representative of such a format. It can use up to 32 bits per color channel. This means that for an image with a red, green, blue, and alpha channel, 4 * 32 bits = 128 bits are available for each color value.
HDR formats allow a much greater contrast range (difference between brightest and darkest colors) than LDR formats. This makes them a prominent image format when it comes to storage of the output result of the rendering process.
PFM #
One of the simplest HDR formats is the Portable Float Map (PFM).
The file header is written as a plain text file,
i.e. you can view and read it with a simple text editor.
To indicate that the file is a PFM file the first line of the file starts with PF or Pf.
PF indicates that the image has three color channels (red, green, blue),
whereas Pf indicates that the image is monochrome, i.e. it only has a single color channel.
Then a Unix-style carriage return follows (hex code 0x0a).
The next line defines the width and height of the image followed again by a Unix-style carriage return.
The third line defines the byte order.
The byte order can be either little-endian (which is indicated by -1.0) or big-endian (which is indicated by 1.0).
Again there is a Unix-style carriage return.
After this, a series of 4-byte IEEE 754 single floating point values follows.
The values are sorted from left to right and from bottom to top to
Here is an example header:
PF
200 200
-1.0
You can easily extract from a PFM file the first three lines using the head command:
head -3 test.pfm
You can also have a look at the hex representation of a PF file via:
head -n 3 /home/vertexwahn/Desktop/test.pfm | hd
Here is an example output of the command:
00000000  50 46 0a 32 30 30 20 32  30 30 0a 2d 31 2e 30 0a  |PF.200 200.-1.0.|
00000010
From the hex dump, you can see the Unix-style carriage return values (0x0a)
Example #
Here is an example C++ program that writes a PFM image with the size of \(200 \times 200\) pixels.
#include <iostream>
#include <fstream>
#include <memory>

namespace shrew {
    struct Color3f {
        explicit Color3f() : values{0.f, 0.f, 0.f} {}
        explicit Color3f(float red, float green, float blue) :
            values{red, green, blue} {}
        float values[3];
    };

    class Image3f {
    public:
        Image3f(int width, int height) : width_{width}, height_{height},
                                         data_{new Color3f[width*height]} {}
        [[nodiscard]] int width() const { return width_; }
        [[nodiscard]] int height() const { return height_; }
        void set_pixel(int x, int y, const Color3f& color) {
            data_[x+y*width_] = color;
        }
        [[nodiscard]] Color3f get_pixel(int x, int y) const {
            return data_[x+y*width_];
        }
        [[nodiscard]] const Color3f* data() const { return data_.get(); }
        [[nodiscard]] size_t byte_size() const {
            return width_ * height_ * sizeof(float) * 3;
        }
    private:
        int width_, height_; // size dimensions of the image
        std::unique_ptr<Color3f[]> data_; // pixel data is sorted left to right, top to bottom
    };

    Image3f flip_horizontally(const Image3f& image) {
        Image3f flipped{image.width(), image.height()};
        for (int y = 0; y < image.height(); ++y) {
            for (int x = 0; x < image.width(); ++x) {
                auto color = image.get_pixel(x,image.height()-y-1);
                flipped.set_pixel(x, y, color);
            }
        }
        return flipped;
    }

    void store_pfm(const Image3f& image, std::string_view filename) {
        std::ofstream file(filename.data(), std::ios::binary);
        file << "PF" << "\n" << image.width() << " " << image.height() << "\n"
             << "-1.0" << "\n";

        Image3f flipped = flip_horizontally(image);

        file.write(reinterpret_cast<const char*>(flipped.data()),
                   static_cast<std::streamsize>(flipped.byte_size()));
    }
}

using namespace shrew;

int main() {
    Image3f image{200, 200};
    for(int y = 0; y < image.height(); ++y) {
        for(int x = 0; x < image.width(); ++x) {
            image.set_pixel(x, y, Color3f{1.f, 1.f, 0.f});
        }
    }

    for(int y = 0; y < image.height()/2; ++y) {
        for(int x = 0; x < image.width()/2; ++x) {
            image.set_pixel(x, y, Color3f{1.f, 0.f, 0.f});
        }
    }

    for(int y = 0; y < image.height()/2; ++y) {
        for(int x = image.width()/2; x < image.width(); ++x) {
            image.set_pixel(x, y, Color3f{0.f, 1.f, 0.f});
        }
    }

    store_pfm(image, "test.pfm");
}
Note that in the above example Image3f stores images from left to right and bottom to top.
This means that the top right pixel is addressed by image.get_pixel(0,0) and the pixel at the right bottom via
image.get_pixel(image.width()-1,image.height()-1).
PFM images are stored differently. They have a bottom-to-top order.
Therefore, the image is horizontally flipped in the store_pfm method.
The output of the generated PFM image looks like this:
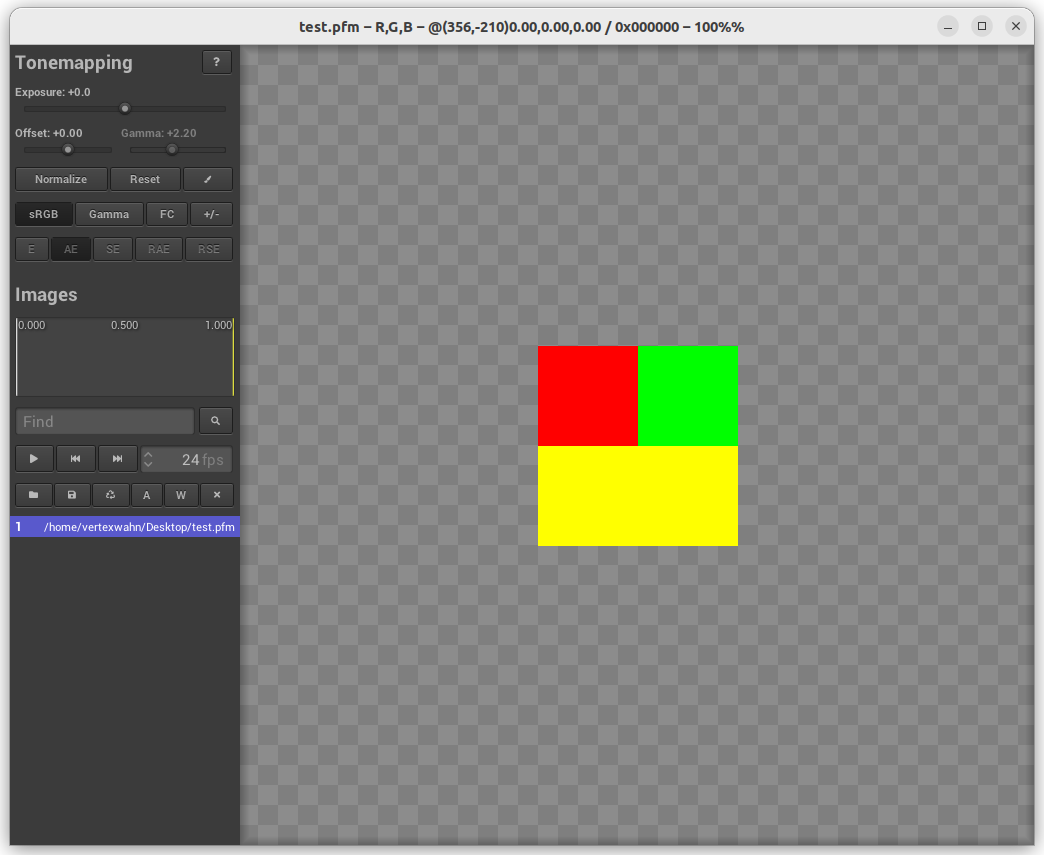
Note that tev is used here as an image viewer.
A C++ function to store PFM float data that is independent of the Image3f and Color3f classes
could also look like this:
void store_pfm(int width, int height, const float* data,
               std::string_view filename) {
    std::ofstream file(filename.data(), std::ios::binary);
    file << "PF" << "\n" << width << " " << height << "\n" << "-1.0" << "\n";
    std::streamsize byte_size = width * height * sizeof(float) * 3;
    file.write(reinterpret_cast<const char*>(data),
               static_cast<std::streamsize>(byte_size));
}
Even if C++ is not your favorite programming language it should not be hard to port this code to a different language. Also, ChatGPT should be able to support you in the endeavor.
The above implementation has some pitfalls.
For instance, there are no out-of-bound checks.
What happens if a user of the Image3f class wants to access a pixel with a negative pixel position?
The implementation still needs some tweaks but the main goal was here to give you an understanding of how a basic HDR file format works.
Another thing that I assumed is that the program is always running on a little-endian machine.
If you run the program on a machine with Big Endian layout you will be in trouble.
EXR #
EXR is a more advanced file format to store HDR images. One library that implements reading and writing this format is OpenEXR.
OpenEXR usage example #
Here is an example of how OpenEXR can be used to store an .exr file:
#include "OpenEXR/ImfChannelList.h"
#include "OpenEXR/ImfOutputFile.h"
#include "OpenEXR/ImfRgbaFile.h"
#include "OpenEXR/ImfStringAttribute.h"

#include <memory>
#include <string_view>

using namespace Imf;
using namespace Imath;

namespace shrew {
    struct Color3f {
        explicit Color3f() : values{0.f, 0.f, 0.f} {}
        explicit Color3f(float red, float green, float blue) :
            values{red, green, blue} {}
        float values[3];
    };

    class Image3f {
    public:
        Image3f(int width, int height) : width_{width}, height_{height},
                                         data_{new Color3f[width*height]} {}
        [[nodiscard]] int width() const { return width_; }
        [[nodiscard]] int height() const { return height_; }
        void set_pixel(int x, int y, const Color3f& color) {
            data_[x+y*width_] = color;
        }
        [[nodiscard]] Color3f get_pixel(int x, int y) const {
            return data_[x+y*width_];
        }
        [[nodiscard]] Color3f* data() { return data_.get(); }
        [[nodiscard]] const Color3f* data() const { return data_.get(); }
        [[nodiscard]] size_t byte_size() const {
            return width_ * height_ * sizeof(float) * 3;
        }
    private:
        int width_, height_; // size dimensions of the image
        std::unique_ptr<Color3f[]> data_; // pixel data is sorted left to right, top to bottom
    };

    void store_exr(Image3f &image, std::string_view filename) {
        Header header(image.width(), image.height());
        header.insert("comments", Imf::StringAttribute("Generated by my awesome App"));

        ChannelList &channels = header.channels();
        channels.insert("R", Imf::Channel(Imf::FLOAT));
        channels.insert("G", Imf::Channel(Imf::FLOAT));
        channels.insert("B", Imf::Channel(Imf::FLOAT));

        FrameBuffer frame_buffer;
        size_t comp_stride = sizeof(float);
        size_t pixel_stride = 3 * comp_stride;
        size_t row_stride = pixel_stride * image.width();

        char *data = reinterpret_cast<char *>(image.data());
        frame_buffer.insert("R", Imf::Slice(Imf::FLOAT, data, pixel_stride, row_stride));
        data += comp_stride;
        frame_buffer.insert("G", Imf::Slice(Imf::FLOAT, data, pixel_stride, row_stride));
        data += comp_stride;
        frame_buffer.insert("B", Imf::Slice(Imf::FLOAT, data, pixel_stride, row_stride));

        OutputFile file(filename.data(), header);
        file.setFrameBuffer(frame_buffer);
        file.writePixels(image.height());
    }
}

using namespace shrew;

int main() {
    Image3f image{200, 200};

    for(int y = 0; y < image.height(); ++y) {
        for(int x = 0; x < image.width(); ++x) {
            image.set_pixel(x, y, Color3f{1.f, 1.f, 0.f});
        }
    }

    for(int y = 0; y < image.height()/2; ++y) {
        for(int x = 0; x < image.width()/2; ++x) {
            image.set_pixel(x, y, Color3f{1.f, 0.f, 0.f});
        }
    }

    for(int y = 0; y < image.height()/2; ++y) {
        for(int x = image.width()/2; x < image.width(); ++x) {
            image.set_pixel(x, y, Color3f{0.f, 1.f, 0.f});
        }
    }

    store_exr(image, "test.exr");
}
To be able to compile this program you need the OpenEXR library and link it to your application.
The Bazel build system can fetch OpenEXR, build it and link it to your application.
Assuming that the above source code is stored in a file named main.cpp you can build and run this program
via Bazel by creating the following files:
mkdir openexr_example
cd openexr_example
echo '7.2.0' > .bazelversion
echo 'build --enable_platform_specific_config
build:macos --cxxopt=-std=c++2b
build:linux --cxxopt=-std=c++20
build:windows --cxxopt=/std:c++20
' > .bazelrc
echo 'cc_binary(
    name = "Demo",
    srcs = ["main.cpp"],
    deps = ["@openexr//:OpenEXR"],
)' > BUILD.bazel
echo 'bazel_dep(name = "openexr", version = "3.2.4")' > MODULE.bazel
The above bash script creates the following files:
.bazelversion:
7.2.0
.bazelrc:
build --enable_platform_specific_config
build:macos --cxxopt=-std=c++2b
build:linux --cxxopt=-std=c++20
build:windows --cxxopt=/std:c++20
BUILD.bazel:
cc_binary(
    name = "Demo",
    srcs = ["main.cpp"],
    deps = ["@openexr//:OpenEXR"],
)
MODULE.bazel:
bazel_dep(
    name = "openexr",
    version = "3.2.4"
)
Now you can run the application via:
bazel run //:demo
This should generate the same file as the one shown in the PFM example.
Modern low dynamic range formats #
A prominent option for low dynamic range (LDR) images is the PNG format. There are many different options for storing LDR images. One of the newer options is WebP. WebP provides similar to PNG a lossless image compression. Here is an example of a WebP image:
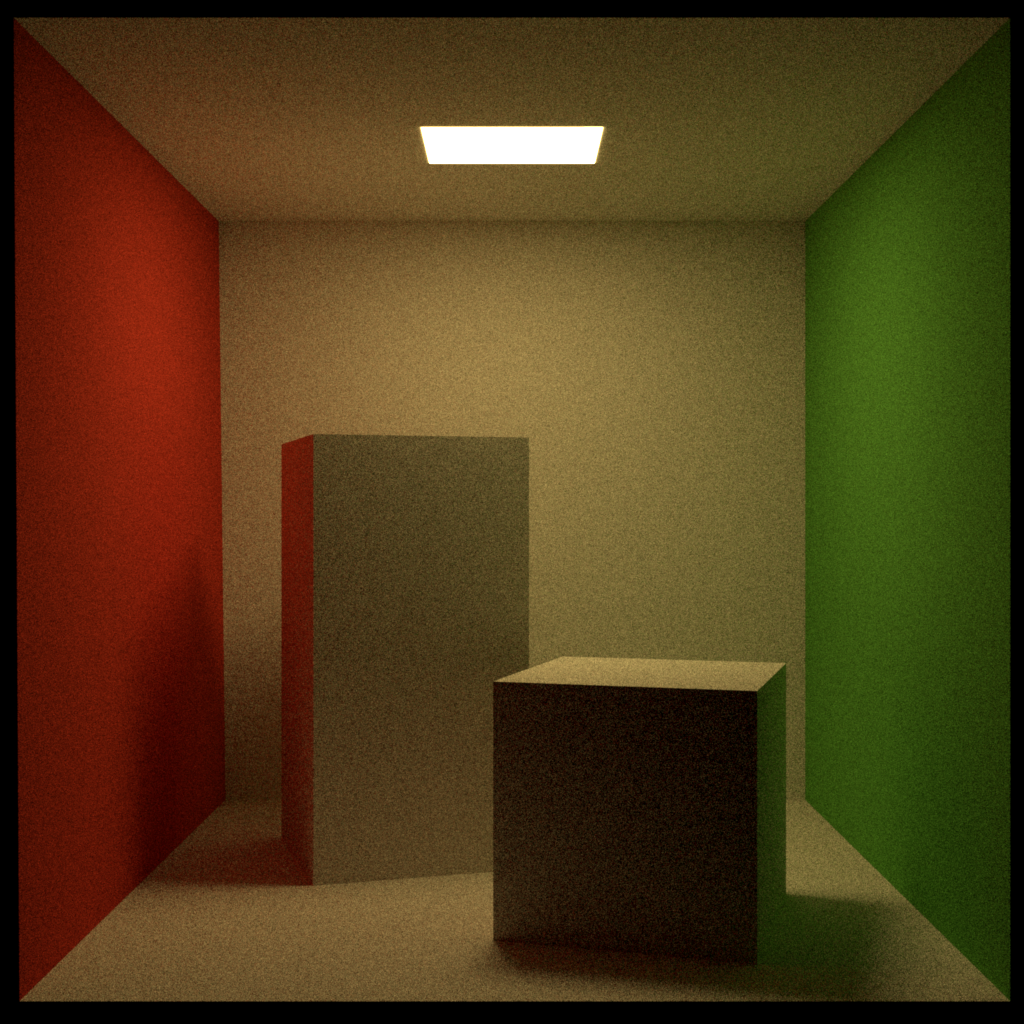
For the above example image the WebP variant is about 0.5 MB smaller:
| Format | Size |
|---|---|
| PNG | 1.7 MB |
| WebP | 1.2 MB |
If you serve a lot of images via a web service per day and have to pay for network traffic and CPU usage image compression can get very important cost-wise. When it comes to compression often there is a trade of between compression speed, decompression speed, and file size.
Here is an example of how image data can be stored as a WebP file using the webp library:
bool store_webp(const char *filename, const Image4b &image) {
    int stride = image.width() * static_cast<int>(sizeof(Color4b));
    uint8_t* out = nullptr;
    auto encoded_size = WebPEncodeLosslessRGBA(image.data(), image.width(), image.height(), stride, &out);
    FILE* file = fopen(filename, "wb");
    fwrite(out, 1, encoded_size, file);
    fclose(file);

    return true;
}
The full source code for this can be found here. A good library that supports many image formats is OpenImageIO.
Spectral images #
Spectral render engines produce spectral images. Instead of storing this data in an RGB image format one approach could be to store this data in spectral image data format. The paper An OpenEXR Layout for Spectral Images gives an overview of the current state of affairs. A spectral viewer can be found here.
To filter or not to filter? That is the question. #
Usually during rendering some filtering process takes place to avoid effects such as aliasing. The problem with the procedure is that after the rendering result is stored as an image you can not change the filtering process. For instance, if you used as a reconstruction filter a tent filter with a radius of 2 pixels and now want to change to 3 pixels you have to rerender the whole scene. The filtering takes only a small fraction of the whole rendering time. If we had stored all samples with the corresponding values we could maybe reuse them when we just change the reconstruction filter. I was always wondering if it makes sense to store individual samples in an image format. Of course, this can get expensive if we render for instance with 8192 samples per pixel. That would mean an image that is filtered 1 MB in total size will blow up to 8 GB. Maybe if the rendering time is really big (> 12h) and we spend a lot time tweaking reconstruction filtering such a format would make sense.